Anatomy Study Tips: A 10-Phase Strategy to Study Anatomy for Your Pilates Exam
Last Updated on October 17, 2026
“Some students retake the exam 2 or 3 times.”
That’s what my instructor trainer told me during my recent STOTT Pilates Instructor Training. The reason why people keep repeating (and paying for) the exam? They don’t study anatomy, or they treat it as an afterthought.
Well, if you’re preparing for your STOTT Pilates exam (or any other Pilates certification) and you don’t want to be one of those students, you’re in the right place.
I can’t study for you, but I can give you a clear plan to tackle that huge roadblock anatomy feels like for most of us at first.
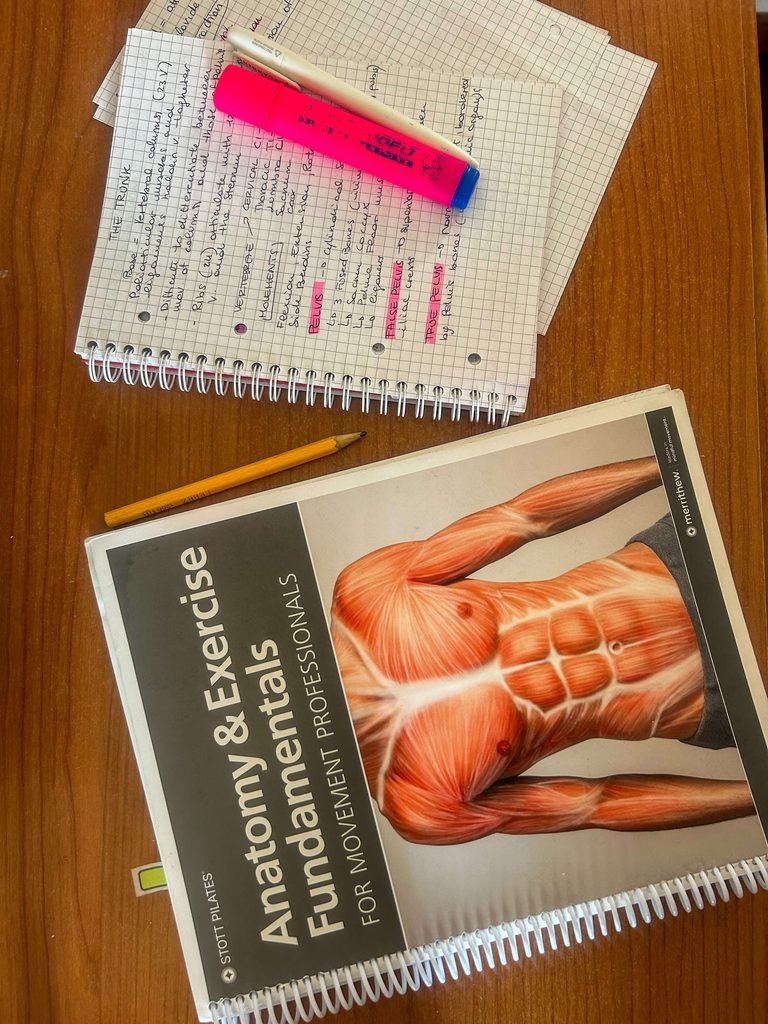
Here’s the thing: anatomy doesn’t work with a short-term mindset. You need at least 6 months to make the concepts stick. Which means you need patience, consistency, and above all, a real strategy.
To me, the best way to learn it is simple: start with the big picture first, and zoom in on the smaller details later. In this post, I’ll share the exact anatomy study tips that will make every anatomical concept way easier to digest.
And PS: You will review the same concepts again, and again, and again. Get used to it!
This article may contain affiliate links. This means that if you purchase through one of the links, I may be paid a small commission at no extra cost to you. Thank you for supporting the blog.
Phase 0: The Vocabulary
Before you touch anything else, you need to learn the basic language. This makes every future concept actually make sense.
These terms include directional words like anterior, posterior, proximal, and medial. Most anatomy textbooks include a dedicated glossary of these terms (including your STOTT Pilates manual), so I won’t list every single one here.
You don’t need to stress about memorizing definitions word for word right away, but you do need to understand what they mean so you aren’t lost every time you open your book.
Phase 1: The Musculoskeletal System
Phase one is all about the big picture: understanding what each element is and its overall function in the body.
- Bones
- Joints
- Muscles
- Tendons
- Ligaments
- Cartilage
Phase 2: Axial vs. Appendicular Skeleton
Learning the different bones by splitting them into the axial and appendicular skeleton is a lifesaver. It makes memorizing where the main joints are so much easier later on:
- Axial skeleton: The central core of the skeleton. It’s made up of the skull, sternum, ribs, vertebral column, and hyoid bone.
- Appendicular skeleton: The bones of the limbs and girdles attached to that core. This includes the upper body (scapula, clavicle, humerus, radius, ulna, and wrist/hand bones) and the lower body (pelvic girdle, femur, patella, tibia, fibula, ankle, and foot bones).
Wherever two bones from these groups meet, you get a joint you’ll need to know.
Phase 3: Bones & Joint Types
Bones are classified by their shape: long, short, flat, irregular, and sesamoid. On their surfaces, they have bony landmarks and ridges that serve as attachment points for muscles. Memorizing every single bump at this point is not essential (just keep in mind that muscles anchor to specific parts of bones).
What matters way more right now is understanding joint types.
The structure of a joint determines exactly which movements are possible there. Some joints don’t move at all (fibrous), some move only slightly (cartilaginous), and others are freely movable.
For your Pilates exam, the primary focus is on freely movable joints: synovial joints. The way two bones articulate (fit together) comes down to the shape of their articulating surfaces (the exact spots where the bones touch).
The main types of synovial joints you need to know are:
- Ball-and-socket (hip, shoulder)
- Hinge (knee, elbow, ankle)
- Pivot (radioulnar)
- Gliding (plane)
- Ellipsoid (condyloid)
- Saddle
In this phase, it can be useful to understand the structure of a synovial joint and its main features (like the joint capsule and ligaments), as well as how cartilage contributes to protecting the bones.
Phase 4: Connecting Bones to Joints
Remember those bones from the axial and appendicular skeleton? This is where you connect the dots. Once you know which bones meet, you can identify the joint type and immediately deduce what movements it can actually perform.
For example:
- Which bones meet? The scapula and the humerus.
- What is the joint called? The glenohumeral joint (the shoulder joint).
- What type is it? A ball-and-socket joint, because the rounded head of the humerus (the ball) fits into the shallow glenoid cavity of the scapula (the socket).
- Available movements? Plenty. Because the cavity is shallow and the head is round, the humerus moves freely across multiple planes.
Good news: you do not need to memorize every tiny intercarpal, metacarpal, or phalangeal joint of the fingers if you’re taking the STOTT Pilates exam. We just need to focus on the major joints that drive core Pilates biomechanics.
Phase 5: Planes of Movement & Axes
Before diving into specific joint actions and the muscles driving them, you need to understand the relationship between planes of movement, axes of rotation, and movements.
Think of a plane as a flat sheet of glass you move along, and an axis as a straight pin the joint rotates around. A movement always happens in a plane and around its perpendicular axis.
Here’s what you should know:
- Planes of motion: Sagittal, coronal, transverse
- Corresponding axes: Around which axis does movement happen in each plane of motion? Coronal, sagittal, or longitudinal?
- Movements available in each plane of motion:
- Flexion / extension
- Dorsiflexion / plantarflexion
- Abduction / adduction
- Lateral flexion
- Medial/laterall rotation
- Horizontal adduction / abduction
- Pronation / supination of the forearm and foot
- Movements at scapular level (protraction/retraction, elevation/depression, upward/downward rotation)
- Movements at the pelvis (anterior, posterior, and lateral tilt)
Phase 6: Key Muscle Concepts
Before you start memorizing a list of muscles, you need to understand how muscles actually work together:
- Muscles come in layers and groups: Some sit deep inside, and you can’t really feel them from the outside, while others are right under your skin (superficial). Memorizing them by muscle groups is much easier (quadriceps, hamstrings, abdominals, rotator cuff muscles, etc.)
- Stabilizers vs. Mobilizers: Some muscles hold joints in place, while others move your bones. A good rule of thumb: the deeper a muscle is and the closer it sits to a joint, the more it works as a stabilizer.
Example: The Transversus Abdominis (TA) is a deep core stabilizer. Your obliques help stabilize and rotate your torso (global stabilizers). Your rectus abdominis (the six-pack muscle) sits right on top and is a mobilizer that curls your spine forward.
- Origins and Insertions: Muscles attach to bones at two ends: the origin is usually the end that stays still, and the insertion is the end that moves. When a muscle contracts, the insertion normally travels toward the origin.
- Reverse Action: But if the moving end is held fixed, the origin travels toward the insertion.
Example: In a bicep curl, your hand moves up to your shoulder (open chain movement). In a pull-up, your hands are glued to the bar, so your whole body and shoulders pull up to your hands (closed-chain movement).
- One-joint vs. Two-joint muscles: Some muscles only cross one joint; others cross two. If a muscle crosses a joint, it moves that joint.
Example: The biceps crosses both your shoulder and your elbow, so it can move both of them.
Phase 7: Types of Muscles Roles & Contraction
To analyze any movement, you need to understand the role each muscle plays. The body always aims for balance: for every muscle creating an action, there’s another muscle doing the exact opposite, while others help out or stabilize the joints.
Here are the 4 main roles you need to know:
- Agonist (Prime Mover)
- Antagonist
- Synergist
- Stabilizer
When it comes to contractions, you need to know the difference between isometric and isotonic:
Inside isotonic contractions, it’s super important to understand concentric vs. eccentric, and how they work together:
Example: In a bicep curl, your bicep contracts concentrically (shortens) as you lift the weight up. As you slowly lower the weight back down with control, that same bicep works eccentrically (lengthens under tension).
Phase 8: Anatomy Study Tips to Memorize Muscles
This phase is the core of your anatomy journey. More than a year after starting my own study, I think I’ve figured out the best way to memorize, retain, and above all understand muscles and their functions.
My take is simple: you should know which movements correspond to each muscle, but you also need to know the list of muscles responsible for any given movement.
Example: The biceps flex the elbow and assist in shoulder flexion. Looking at it the other way around: elbow flexion is performed by the biceps as the primary mover, with the brachialis and brachioradialis acting as synergists.
So how do you actually do this?
Start from the main structures and joints again. Ask yourself: Which movements are available at this joint? Which muscles originating and inserting around it produce those movements?
Here is the exact breakdown to use:
- Muscles moving the thorax and spine
- Muscles moving the head and neck
- Muscles moving the pelvis (anterior, posterior, and lateral pelvic tilt)
- Muscles moving the hip joint (coxal joint)
- Muscles moving the knee joint
- Muscles moving the ankle and foot
- Muscles moving the shoulder joint (glenohumeral joint)
- Muscles stabilizing and moving the scapula
- Muscles moving the elbow and wrist
What do you really need to know?
Trying to memorize every single origin and insertion will make you go crazy. Knowing the general area of origin and insertion is easier (it is always anchored around the joint the muscle moves)
As you progress, your brain will see those pictures repeatedly, and the exact point of attachment will start sticking naturally.
What matters most is knowing what a muscle actually does. Once you know its action and which joint it crosses, deducing the origin and insertion becomes so much easier.
Phase 9: Muscles of Respiration
Breathing is a fundamental principle in Pilates and the very first biomechanical principle in STOTT Pilates.
Here is what you need to know:
- Breathing biomechanics: What happens inside the body during inhalation and exhalation, how thoracic pressure shifts, and how breathing directly affects the rib cage and spine.
- Muscles involved in respiration: Which muscles drive rib cage elevation during inhalation (diaphragm, external intercostals, scalenes) versus depression and contraction during active exhalation (internal intercostals, transversus abdominis, obliques).
- Movement of the ribs during breathing: The “pump-handle” motion of the upper ribs and the “bucket-handle” motion of the lower ribs.
Phase 10: Movement Analysis
Learning anatomy is useless if you cannot apply it to real movement. This is where your written and practical exams test whether you actually understand the concepts:
- Plane of motion: In which plane does the exercise happen?
- Joints involved: Which specific joints are moving?
- Muscle actions & contraction types: Which muscles are working concentrically to drive the movement, which are working eccentrically to control it against gravity or spring resistance, and which are holding isometrically?
Finally, it’s essential to understand the difference between open-chain and closed-chain movements.
In open chain (like tabletop position exercises), the legs move freely, and the insertion travels toward the origin. In closed chain (like feet planted on the floor), the distal end is fixed, which triggers the reverse action where the origin moves toward the insertion.
Best Resources to Study Anatomy on Your Own
I started studying anatomy a full year before my STOTT Pilates instructor training, and that’s the best decision I could have made. There are a couple of resources that really helped me on my journey and can guide your study sessions:
- Trail Guide to the Body: The best investment for anatomy self-study. It has so much more information than the flashcards, and you’ll find everything you need: bones, joints, tissues, muscles, and palpation tips for the postural analysis part of the exam (if you’re a STOTT trainee).
- Pilates Anatomy: Anatomy applied to Pilates exercises (essential to understand movement, working muscles, and contractions)
I’ve listed more resources and tips to prepare for your STOTT Pilates exam. However, these are the minimum investments.
That’s it for today’s post!
Hopefully, these anatomy study tips help you strategize your study so it feels clearer, more meaningful, and a lot less overwhelming.
I’ve also just launched a Substack where I’ll be sharing plenty of resources to help Pilates trainees study efficiently, make concepts stick, and get an honest look at what it really takes to build a Pilates career from scratch.
Come say hi!